Auto Purchase Orders logo Auto Purchase Orders
Help Center / Purchase order custom fields

Overview


Purchase order custom fields let you store extra information on a PO. Use them for details that belong to the whole purchase order, not to an individual product line.

For example, you can use custom fields to track:

  • Shipping account
  • Approval status
  • Deposit amount
  • Internal reference number
  • Production notes

A custom field starts as a definition. The definition controls the field name, value type, supplier availability, and order. When you create or edit a PO for an assigned supplier, the app adds the matching custom fields to the PO form.
Create your first custom field

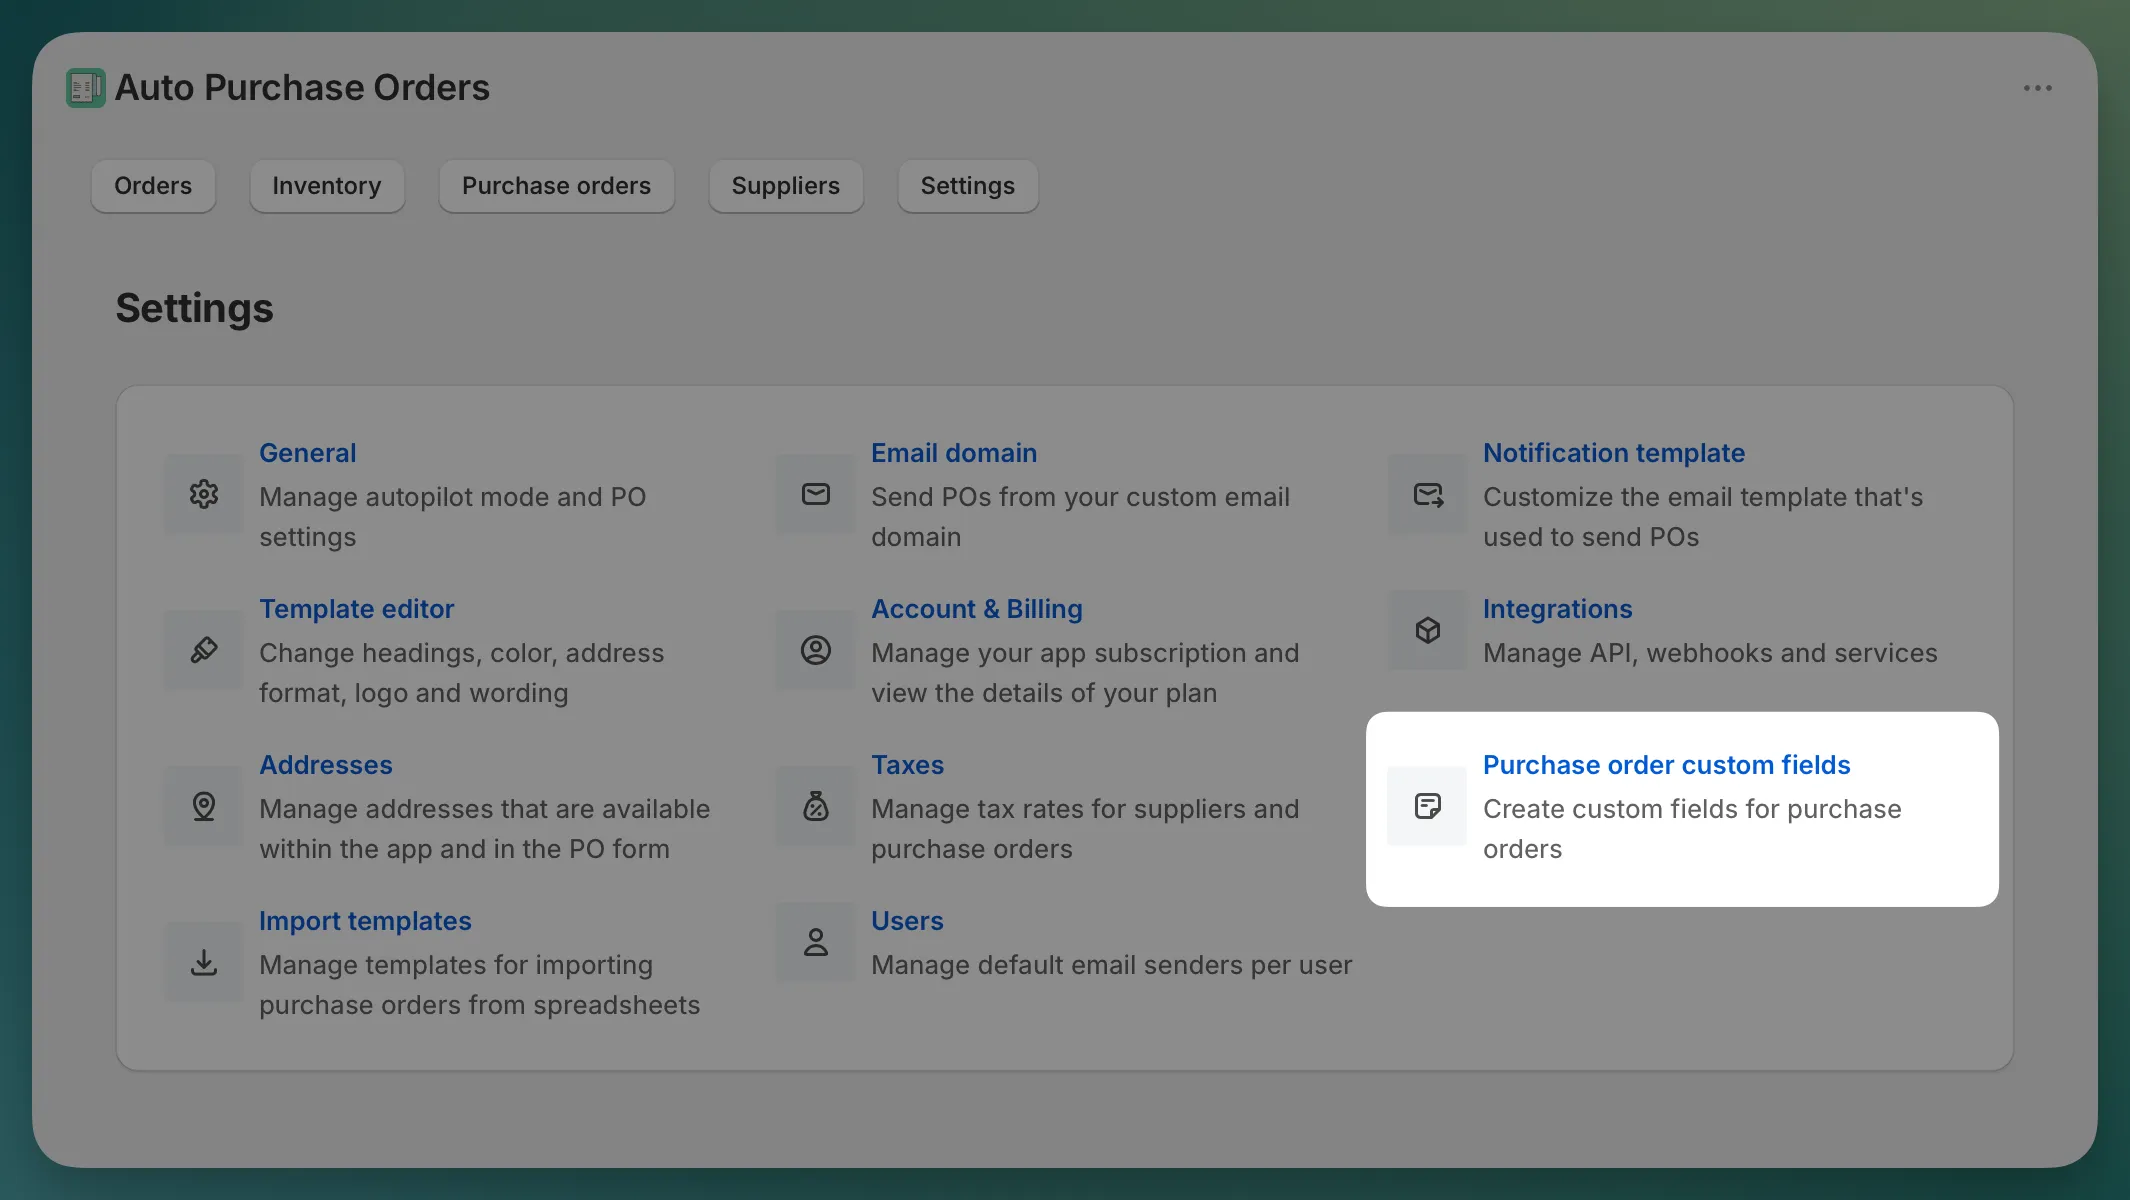
  1. From your app, go to Settings > Purchase order custom fields.
App settings page
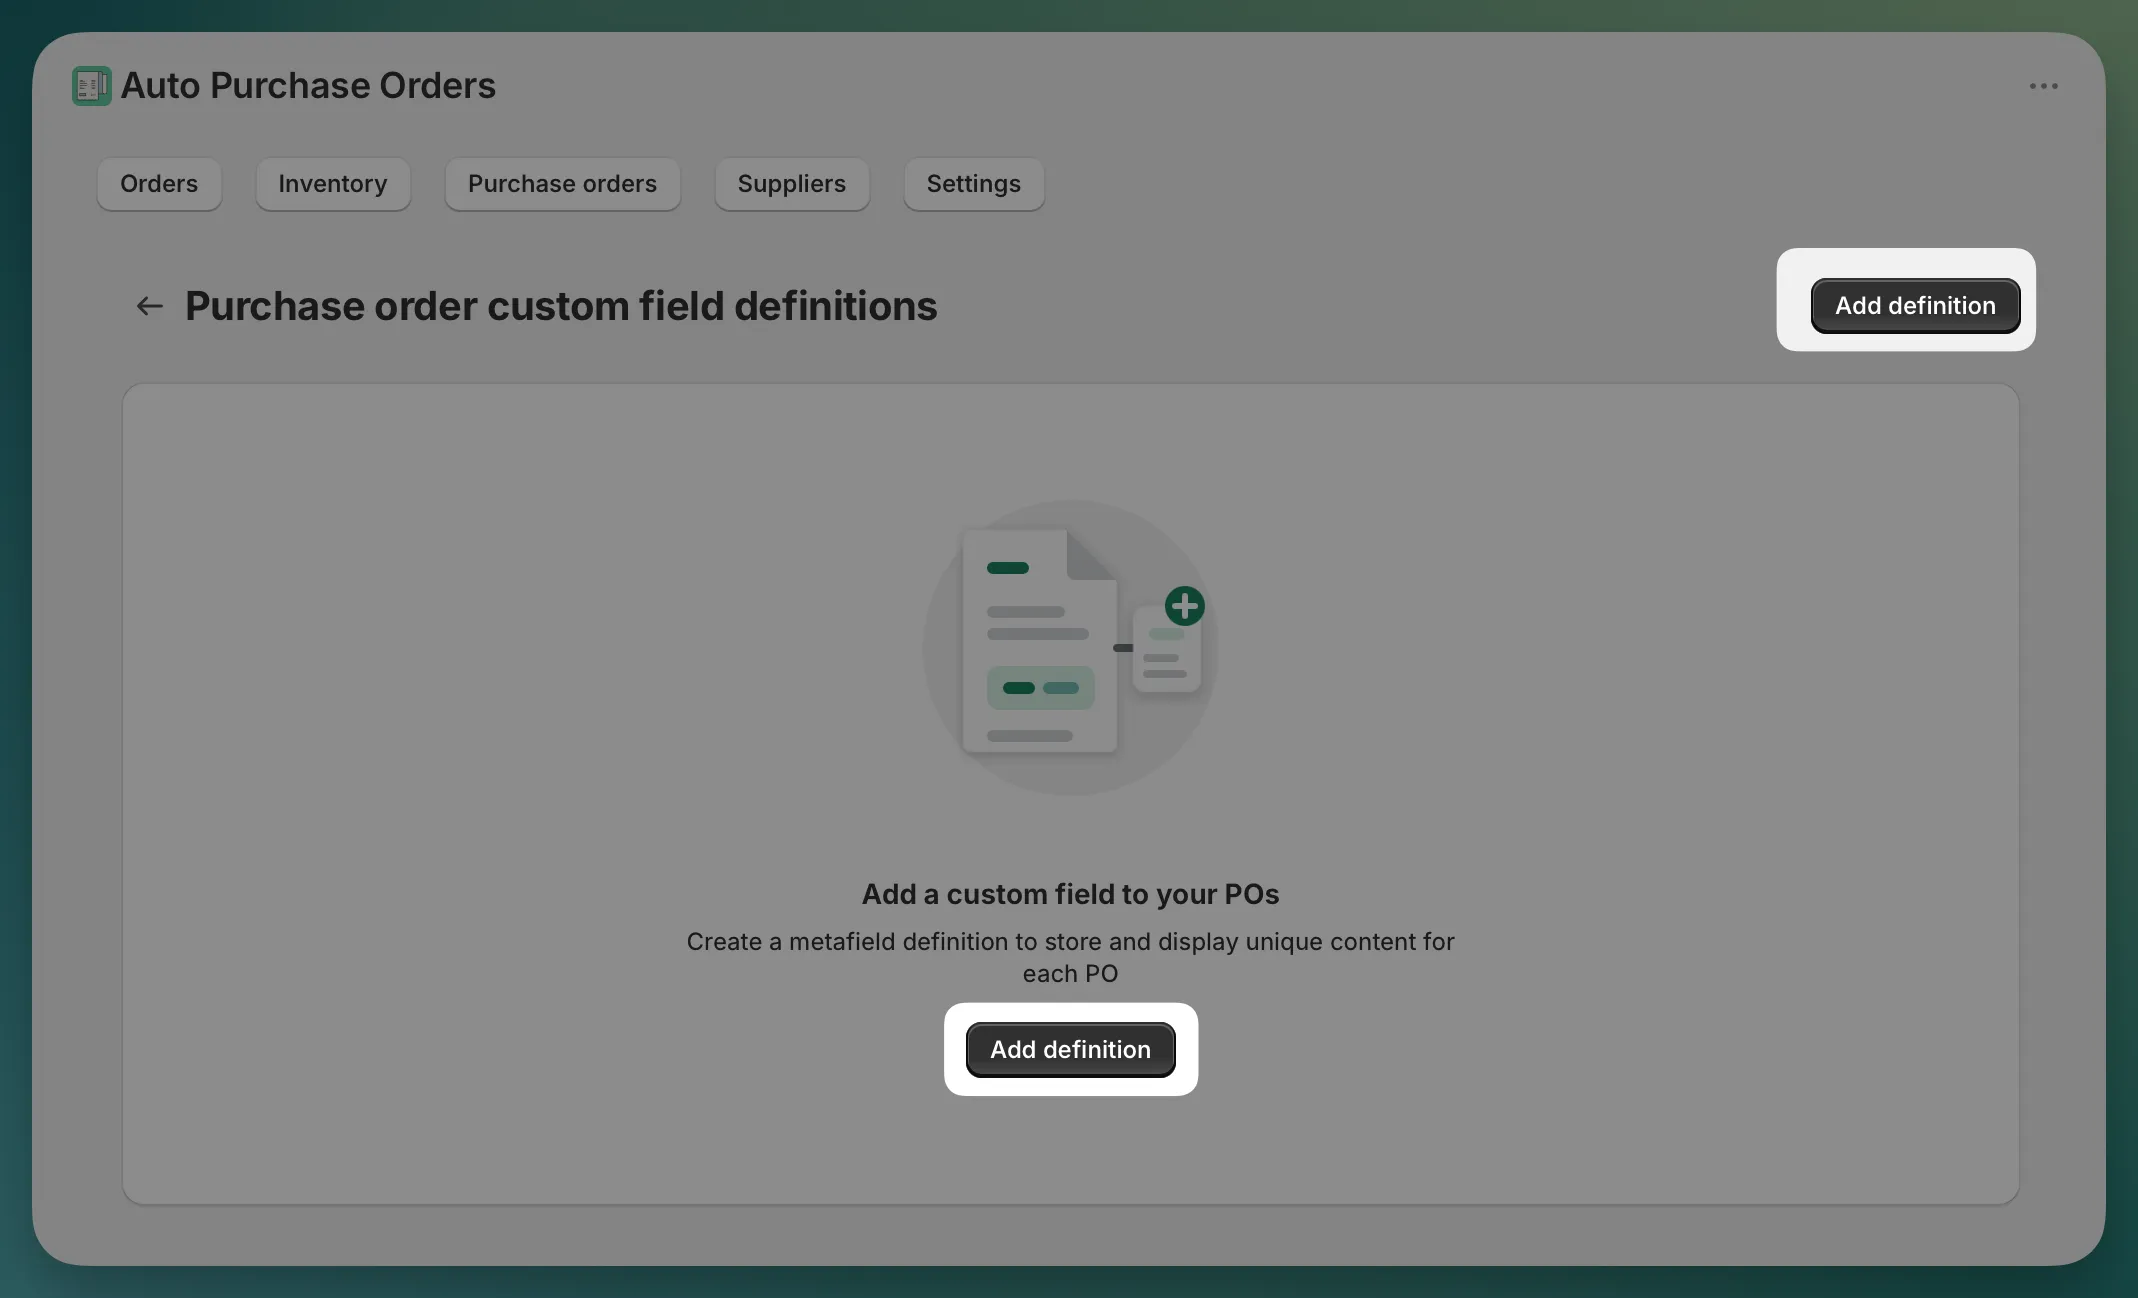
  1. Click Add definition.
New definition button
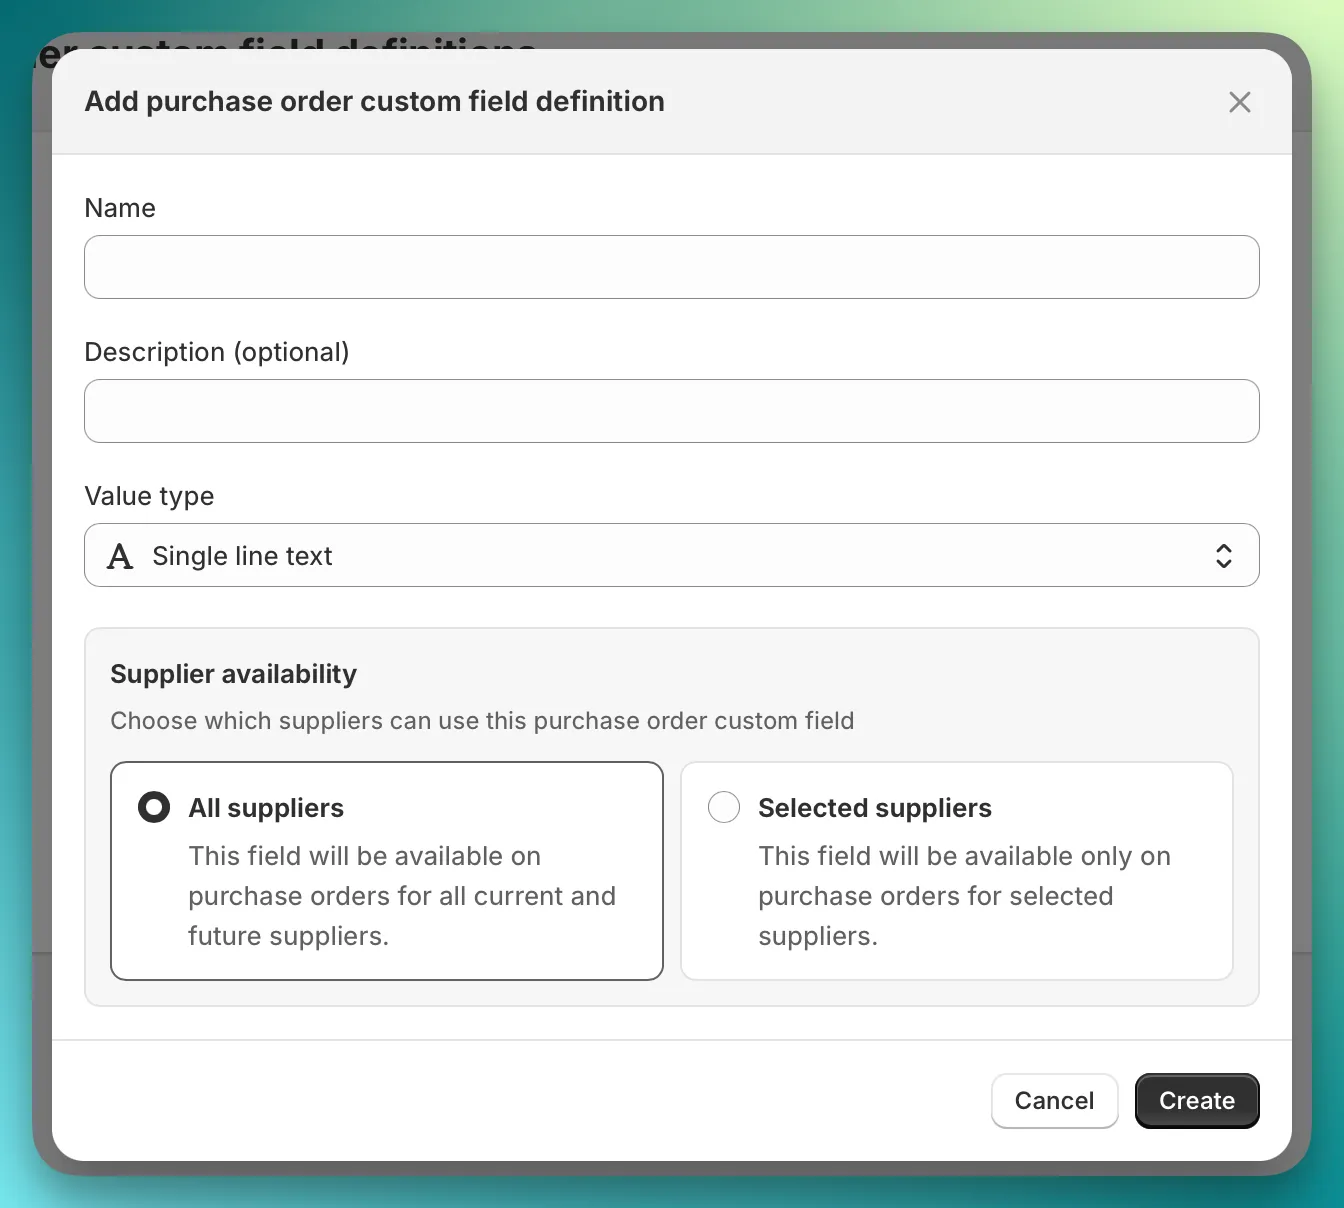
  1. Fill in the definition details
New definition button
  • Name - The field label users will see on the PO form. Use a short name, such as Approval status, Deposit amount, or Shipping account.
  • Description - Optional help text that appears when users fill in the field. Use it when the name alone is not enough.
  • Value type - The kind of value users can enter on the PO.
  • Supplier availability - The suppliers that can use this field. Choose All suppliers for every current and future supplier, or Selected suppliers for specific suppliers only.

You cannot change the value type after the custom field is created.

Use a short name that users will understand on the PO form, such as Approval status, Deposit amount, or Shipping account.

  1. Click Create.

The custom field is now available on PO forms for the suppliers you selected.


What happens next

After a custom field is created, you can:

  • Fill it in when creating or editing a PO.
  • Set default values from a supplier page.
  • Show it on PO and packing slip templates.
  • Use it in supplier email templates.
  • Include it in PO imports and exports.

Auto Purchase Orders logo
Auto Purchase Orders
Designed, built, and backed by Magic Bits
Dan
Written by Dan
Published on