Auto Purchase Orders logo Auto Purchase Orders
Help Center / Supplier

How to link Shopify products to the supplier


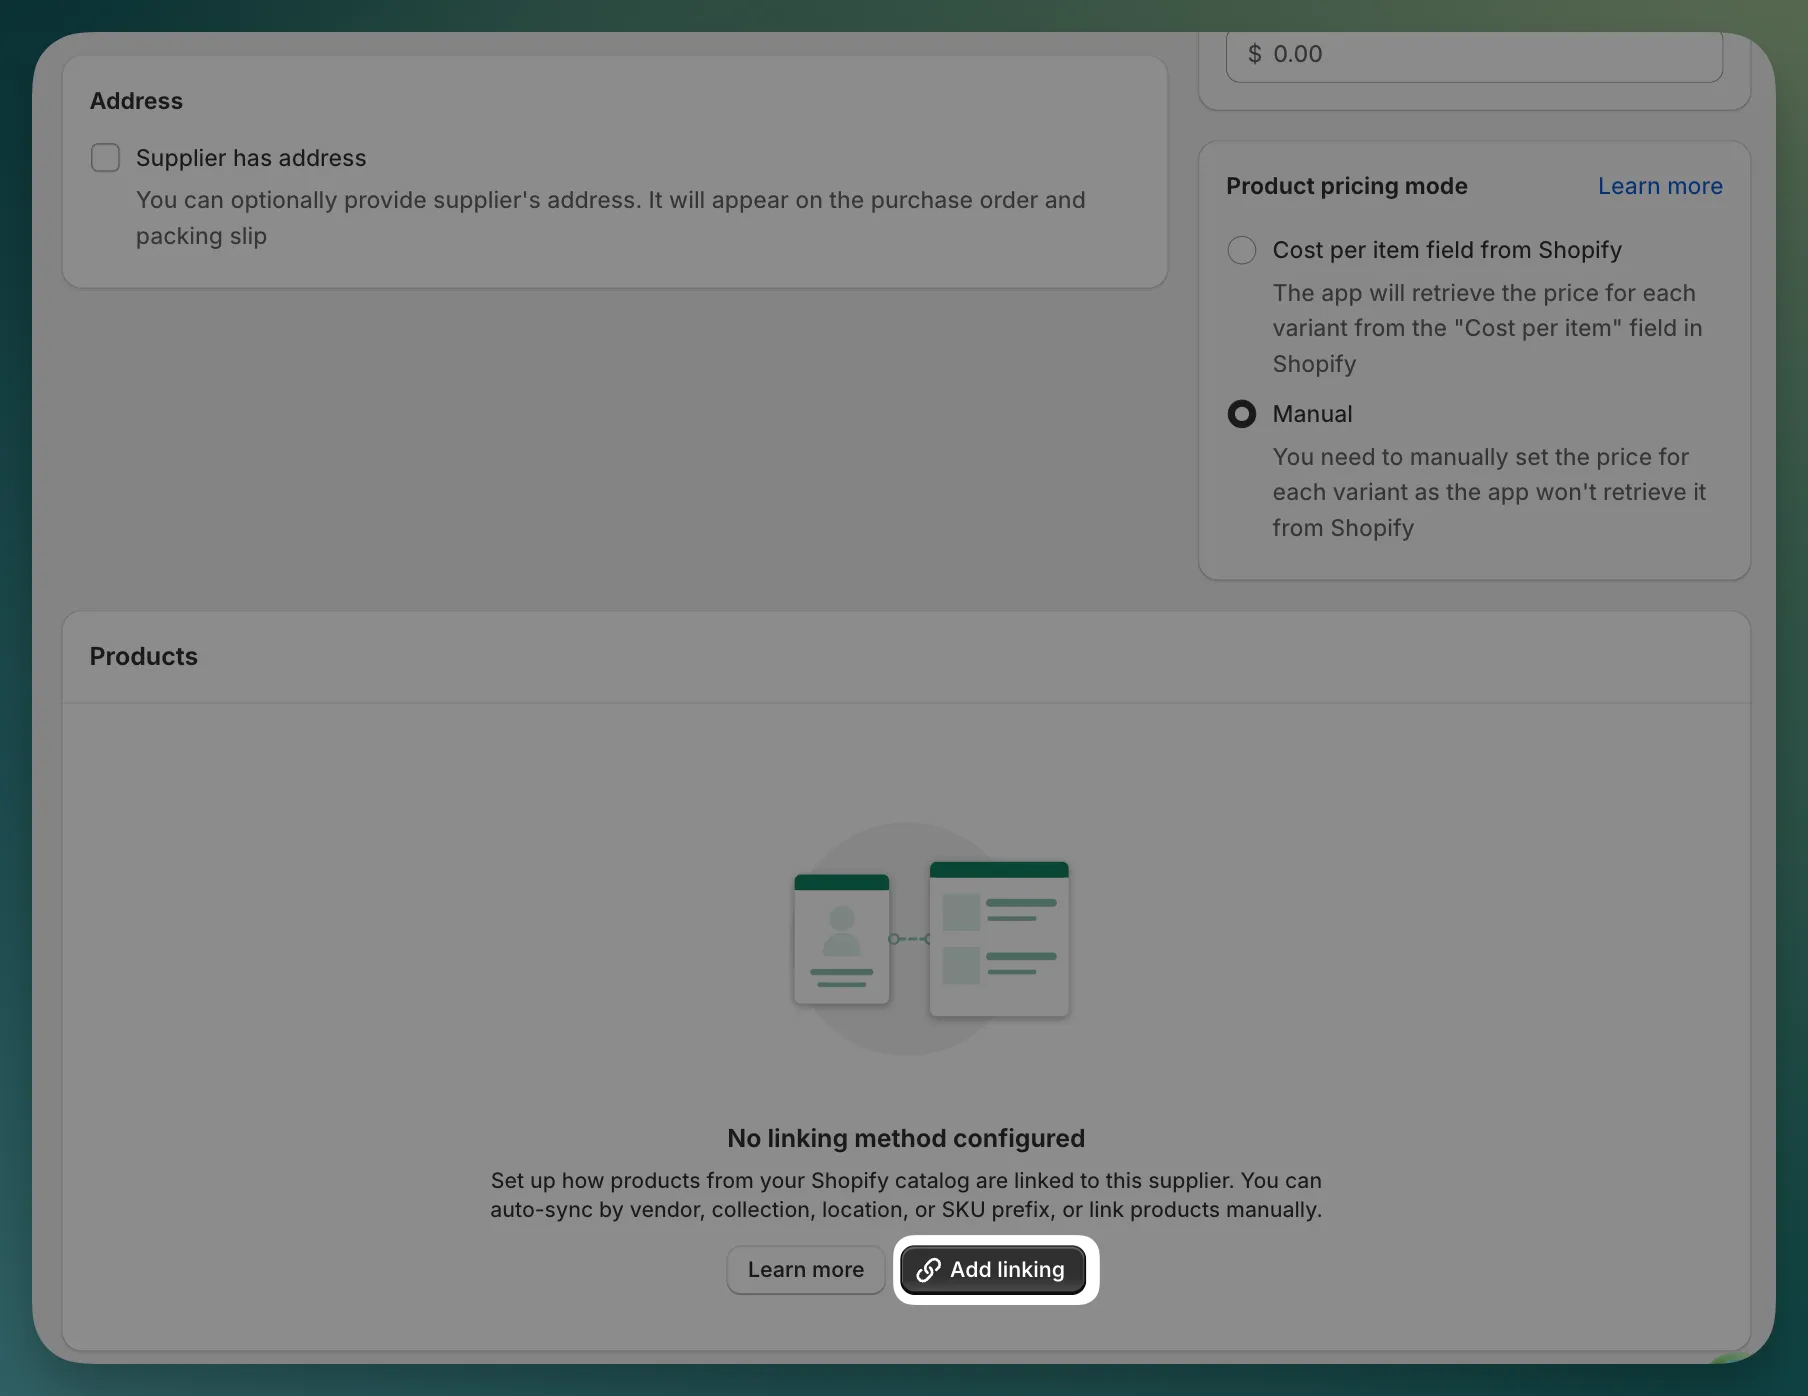
There are two ways to link products: auto-sync (recommended) and manual selection. Both can be configured when creating a new supplier or changed at any time from the supplier’s edit page.

Before you begin

  • Make sure the products you want to link are already in your Shopify catalog.
  • If you plan to use auto-sync, verify that your products have the relevant data set up in Shopify (e.g. vendors, collections, or locations assigned).

Auto-sync automatically links every product that matches a rule you define — and keeps it up to date going forward.

Example: Set the sync method to “By vendor” and select “Burberry”. Every current and future product from that vendor will be linked to the supplier automatically.
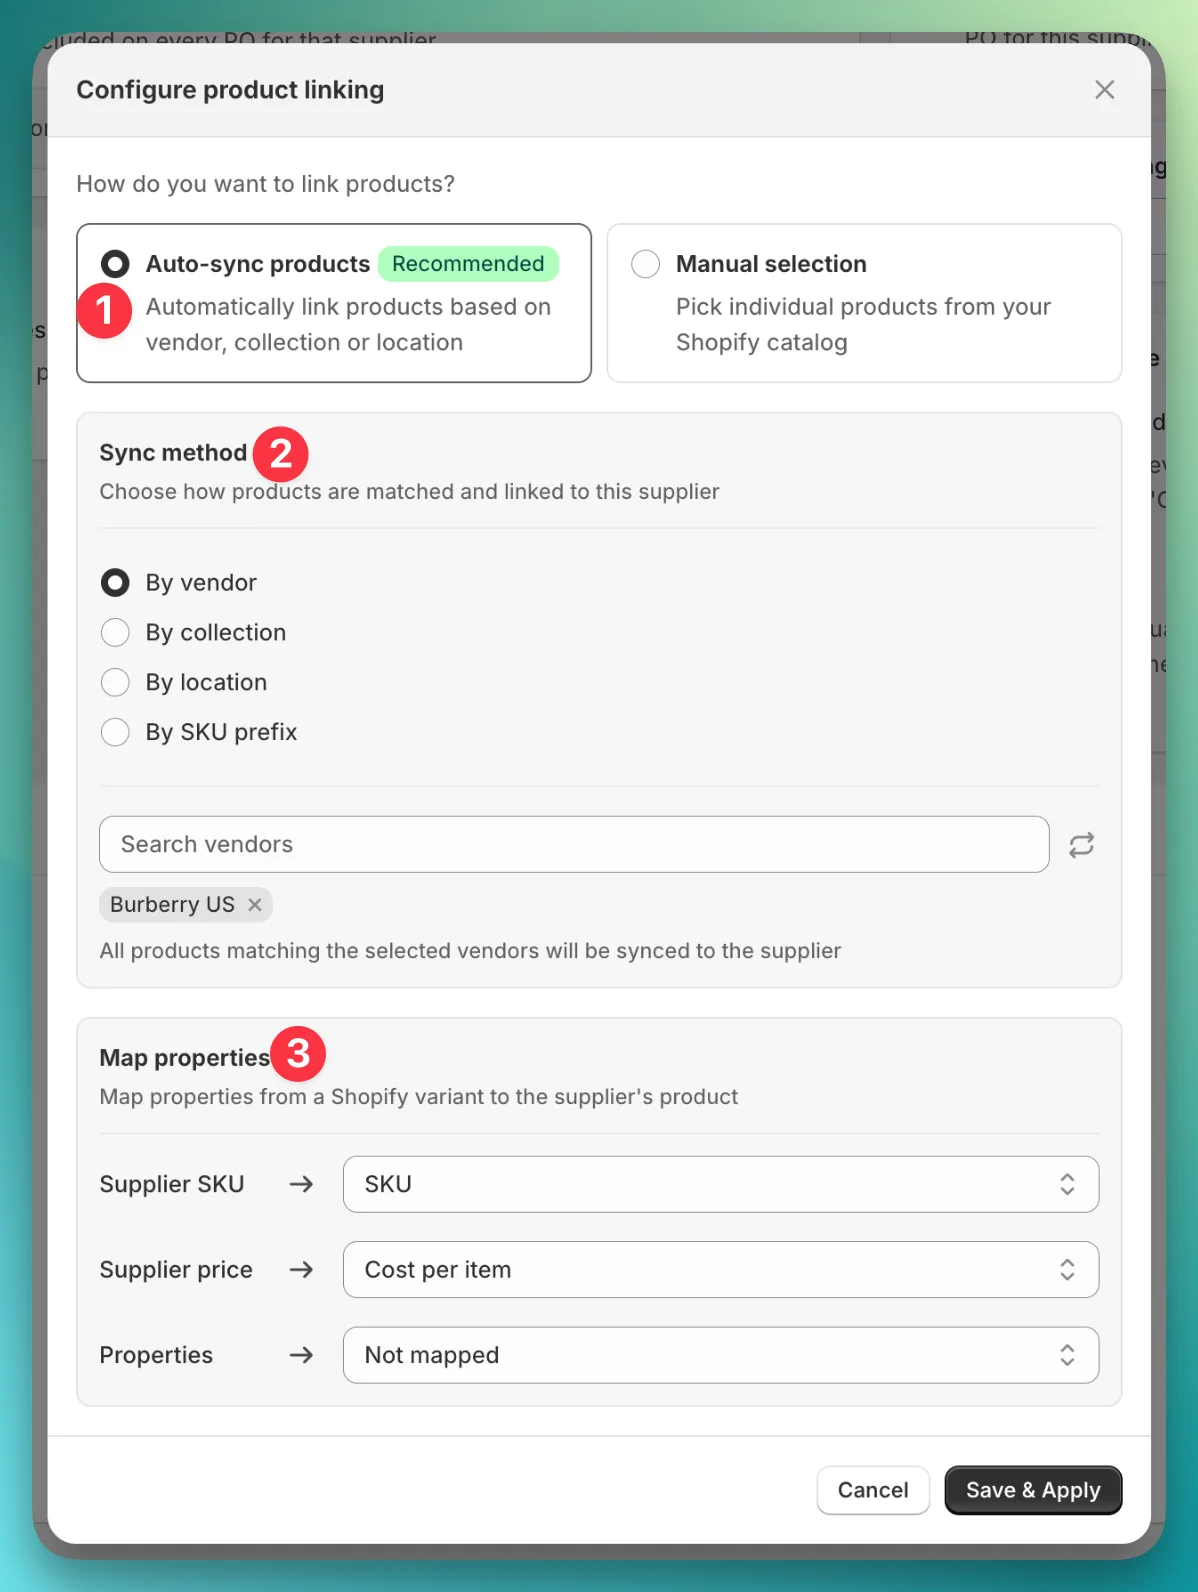
Steps

  1. Open the app and navigate to the Suppliers page
  2. Create a new supplier or open an existing one
  3. In the Products card, click Add linking (on new suppliers) or Configure (on existing suppliers)
    Linking new supplier
    Linking existed supplier
  4. In the Configure product linking modal, select Auto-sync products
  5. Choose a sync method and fill in the required fields (see table below)
    Auto sync modal configure
  6. Optionally configure property mapping
  7. Click Save

Sync methods

Sync methodWhat it does
By vendorLinks all products from the selected Shopify vendors (product-level)
By collectionLinks all products in the selected Shopify collections (product-level)
By locationLinks all products available at the selected locations (product-level)
By SKU prefixLinks all variants whose SKU starts with the specified prefix (variant-level)

Map properties

The Map properties section controls how Shopify data maps to supplier-specific fields. This determines what auto-fills when you add the product to a purchase order.

  • Supplier SKU — The Shopify field used as the supplier’s SKU. For example, if your supplier identifies items by barcode, select Barcode.
  • Supplier price — The Shopify field used as the supplier’s unit cost. For example, select Cost per item if that matches what your supplier charges.
  • Tax percent — Optionally assign a tax category that applies to all products from this supplier.
  • Properties — Optionally sync extra data from variant or product metafields (e.g. material, weight, country of origin).

Trigger an immediate sync

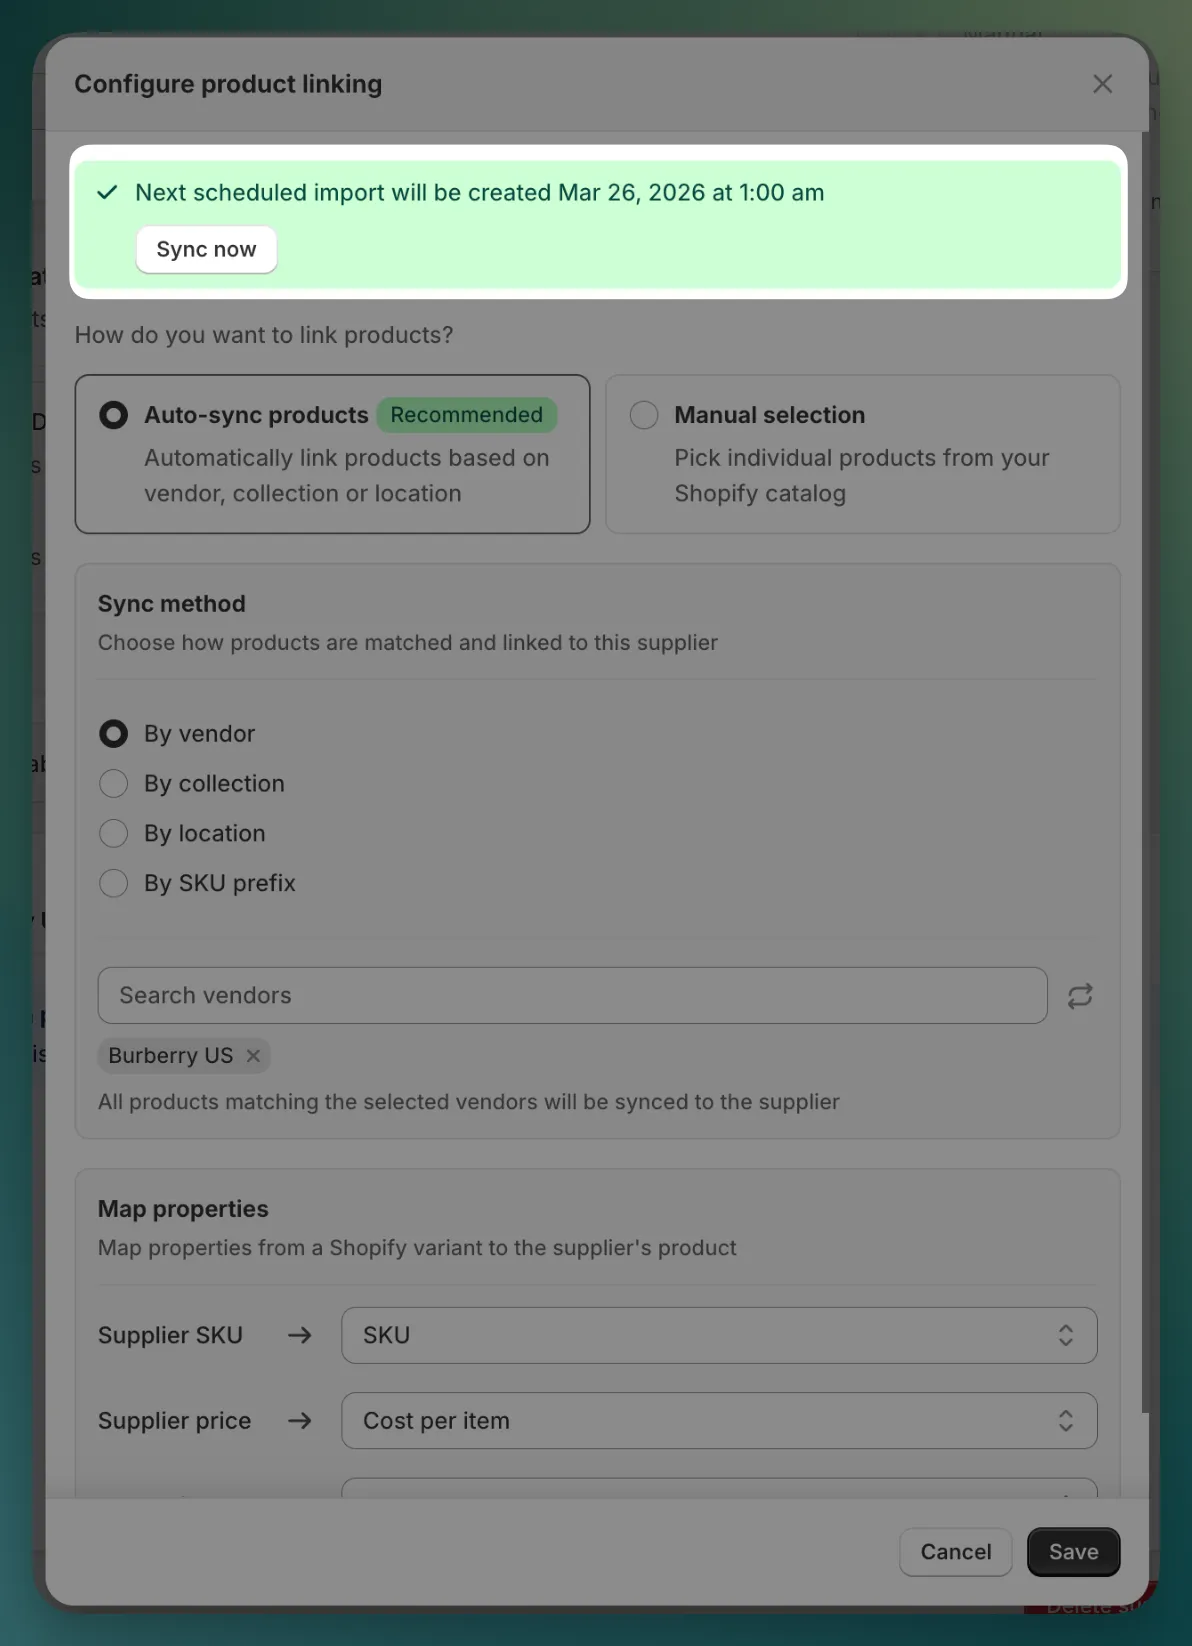
After saving your auto-sync configuration on an existing supplier, click Sync now to import matching products immediately instead of waiting for the next scheduled run.

Auto sync now

Why can’t I edit products in auto-sync mode?

When auto-sync is enabled, the app fully manages the supplier’s product list based on your sync rule. Adding or removing products manually is disabled because:

  • The next sync would overwrite your changes. Any manually added product that doesn’t match the rule would be removed, and any manually removed product that still matches would be re-added.
  • It keeps the product list predictable. The list always reflects exactly what the sync rule defines — no surprises.

If you need to add or exclude specific products, update the matching criteria in your Shopify catalog (e.g. change a product’s vendor, move it to/from a collection, or adjust its SKU) and then click Sync now to apply the changes immediately.


Method 2: Manual selection

Use this method to hand-pick individual products from your Shopify catalog. Best suited for suppliers with a small, stable product range.

Steps

  1. Open the app and navigate to the Suppliers page
  2. Create a new supplier or open an existing one
  3. In the Products card, click Add products
  4. In the resource picker, select the products you want to link
  5. Optionally set Supplier SKU, Price, and Tax Percent for each product
  6. Save the supplier

Tip: If you find yourself manually linking many products, consider switching to auto-sync — it handles large catalogs without the overhead.


What happens next?

Once products are linked, they appear in the supplier’s Products card. From that point on:

  • Their details (SKU, cost, tax) auto-fill whenever you add them to a purchase order.
  • Shopify order-based POs automatically route items to this supplier.
  • The supplier becomes available for combined PO generation.

Auto Purchase Orders logo
Auto Purchase Orders
Designed, built, and backed by Magic Bits
Dan
Written by Dan
Published on