Before you start with your first combine, make sure to link Shopify products to their corresponding suppliers in the app. Check this guide.
This guide provides details on how to start working with the combine feature. The app supports two ways to create a combine: manually selecting Shopify orders or using a date-range filter.
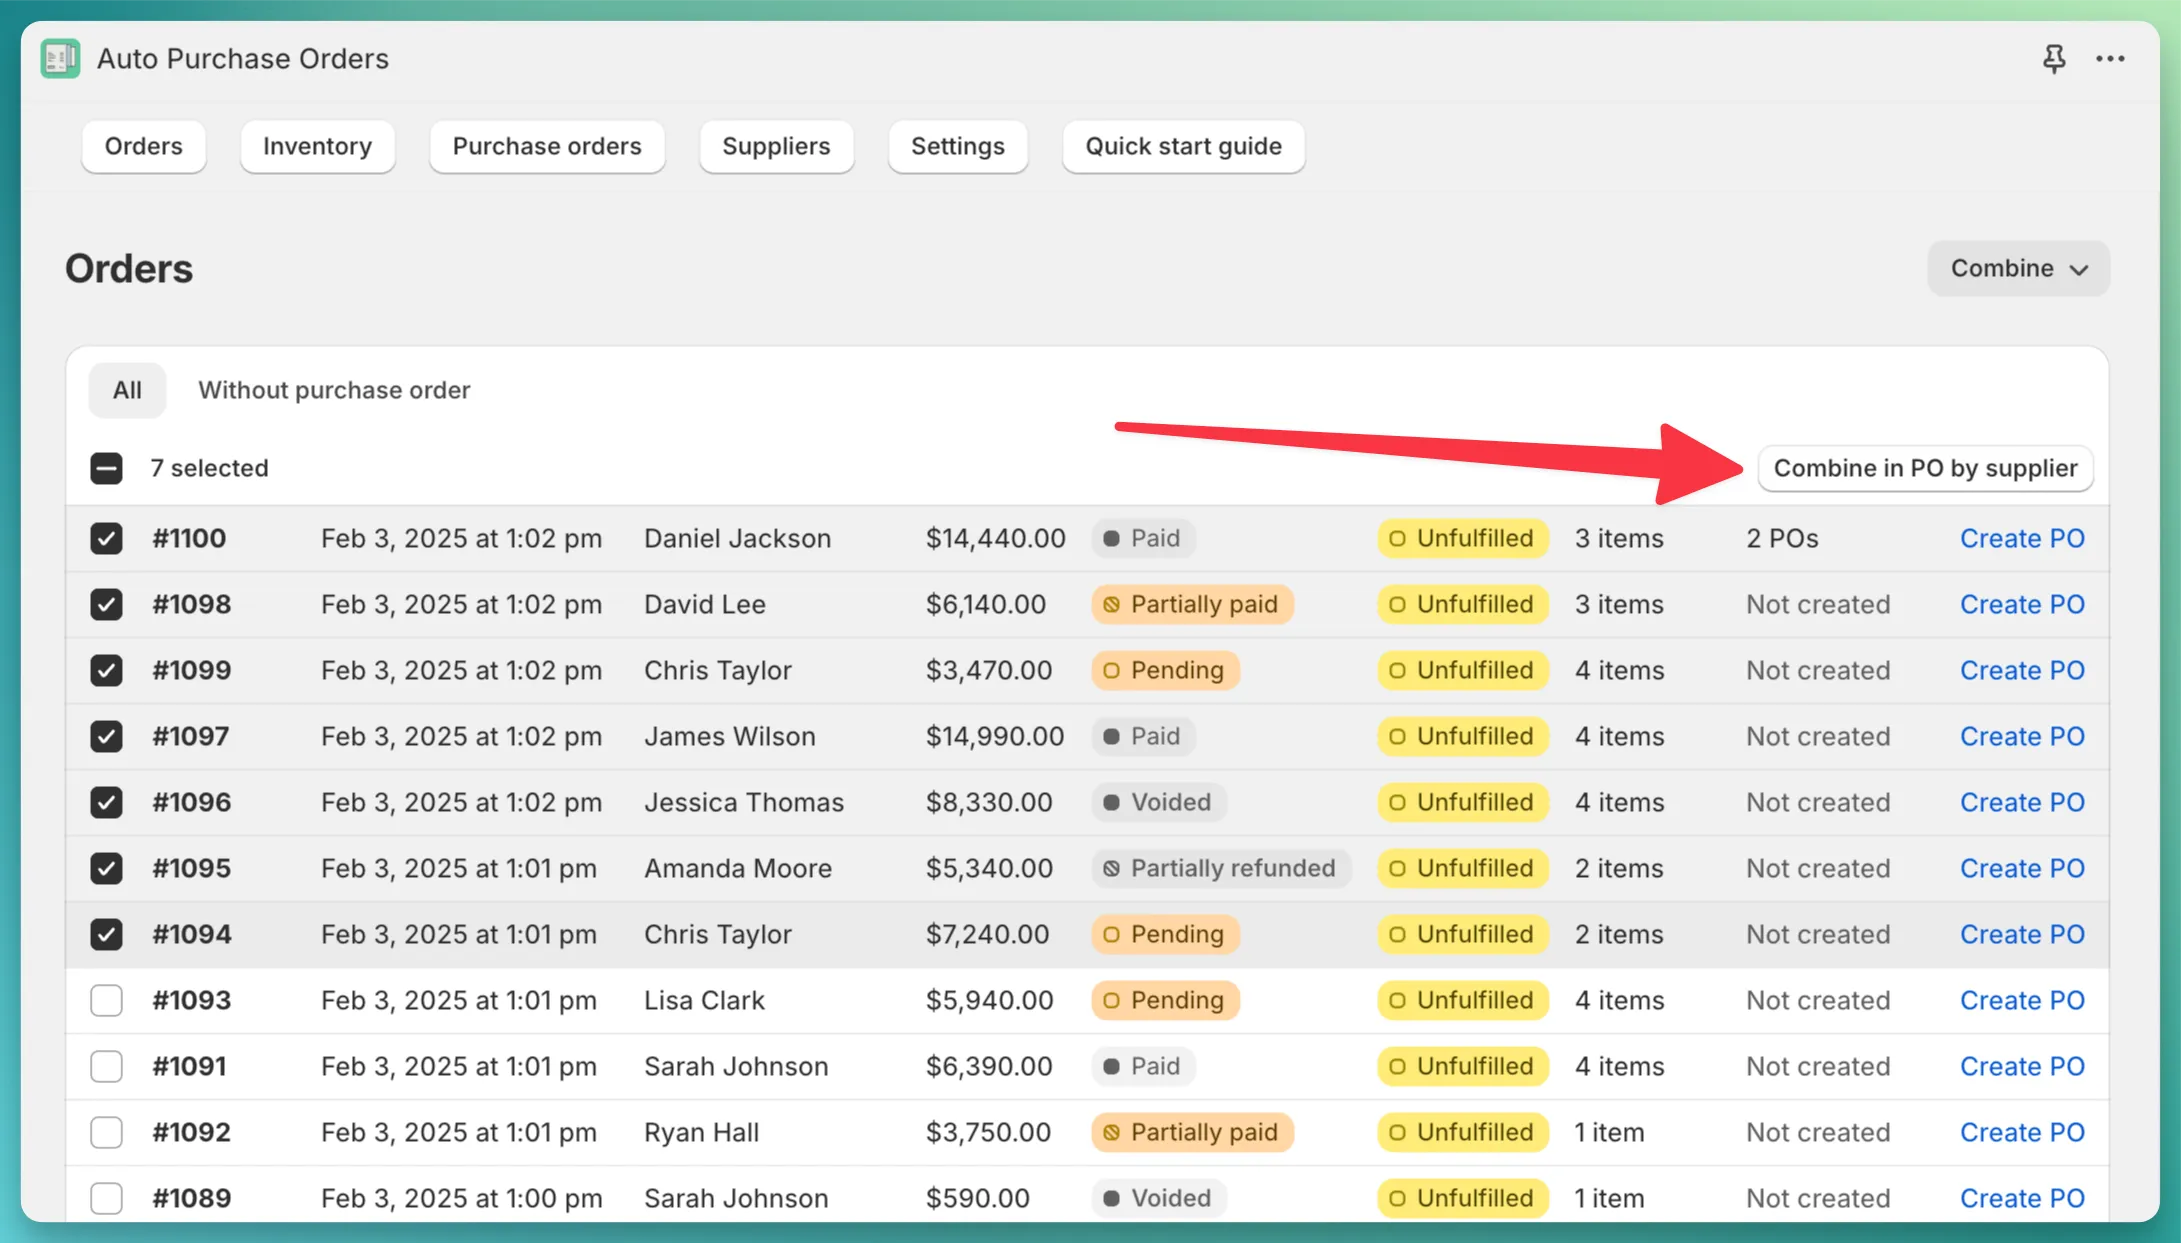
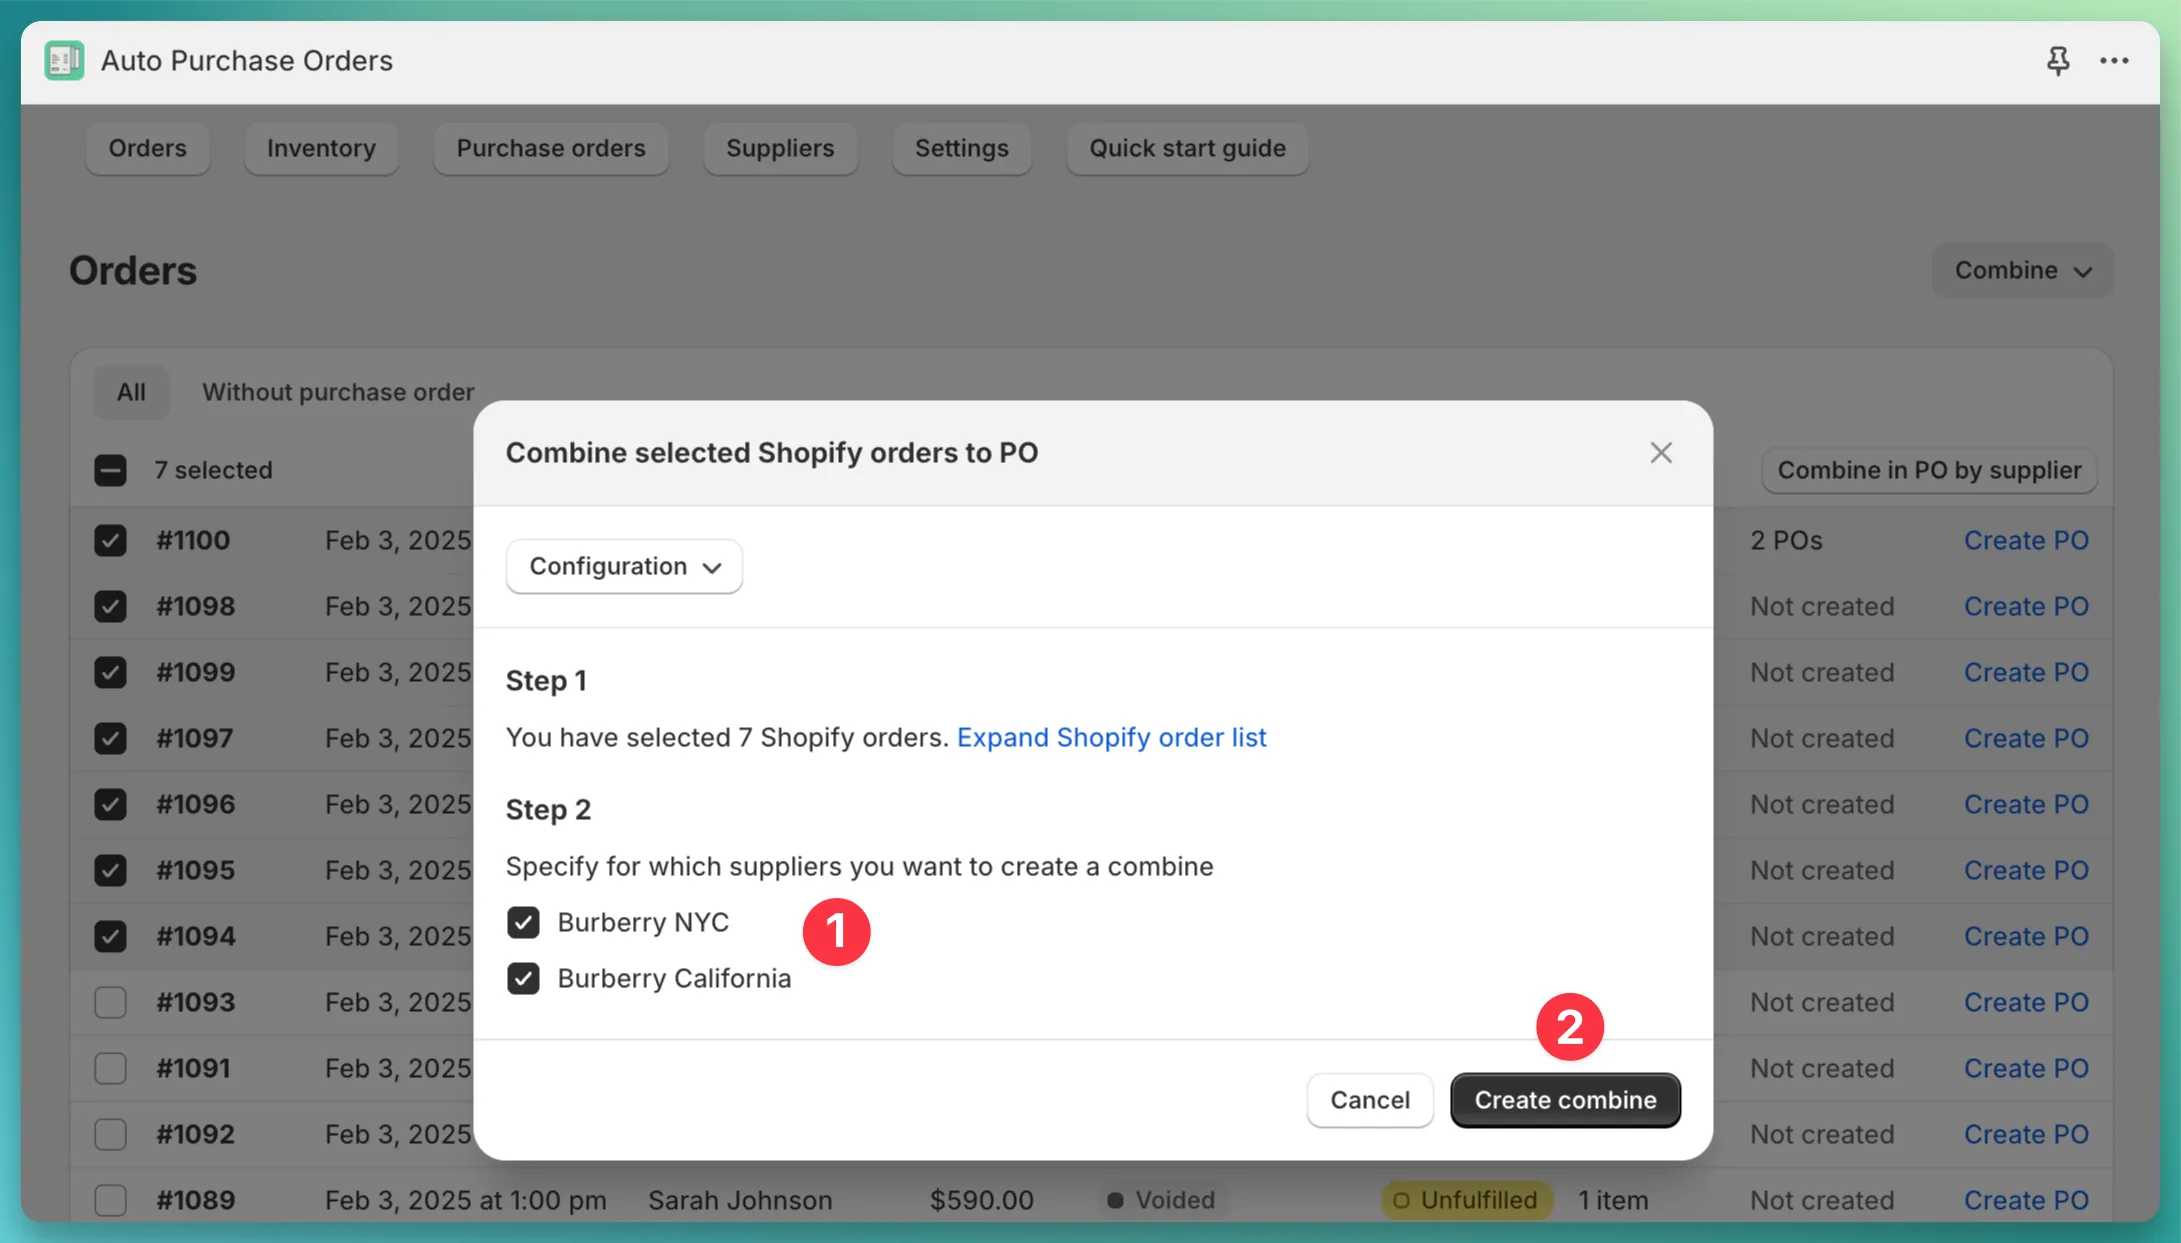
This method provides more granular control over which Shopify orders are included in the combine, but it has one limitation – you can’t combine more than 50 Shopify orders at a time.
In order to create a combine:
Combine in PO by supplier button.
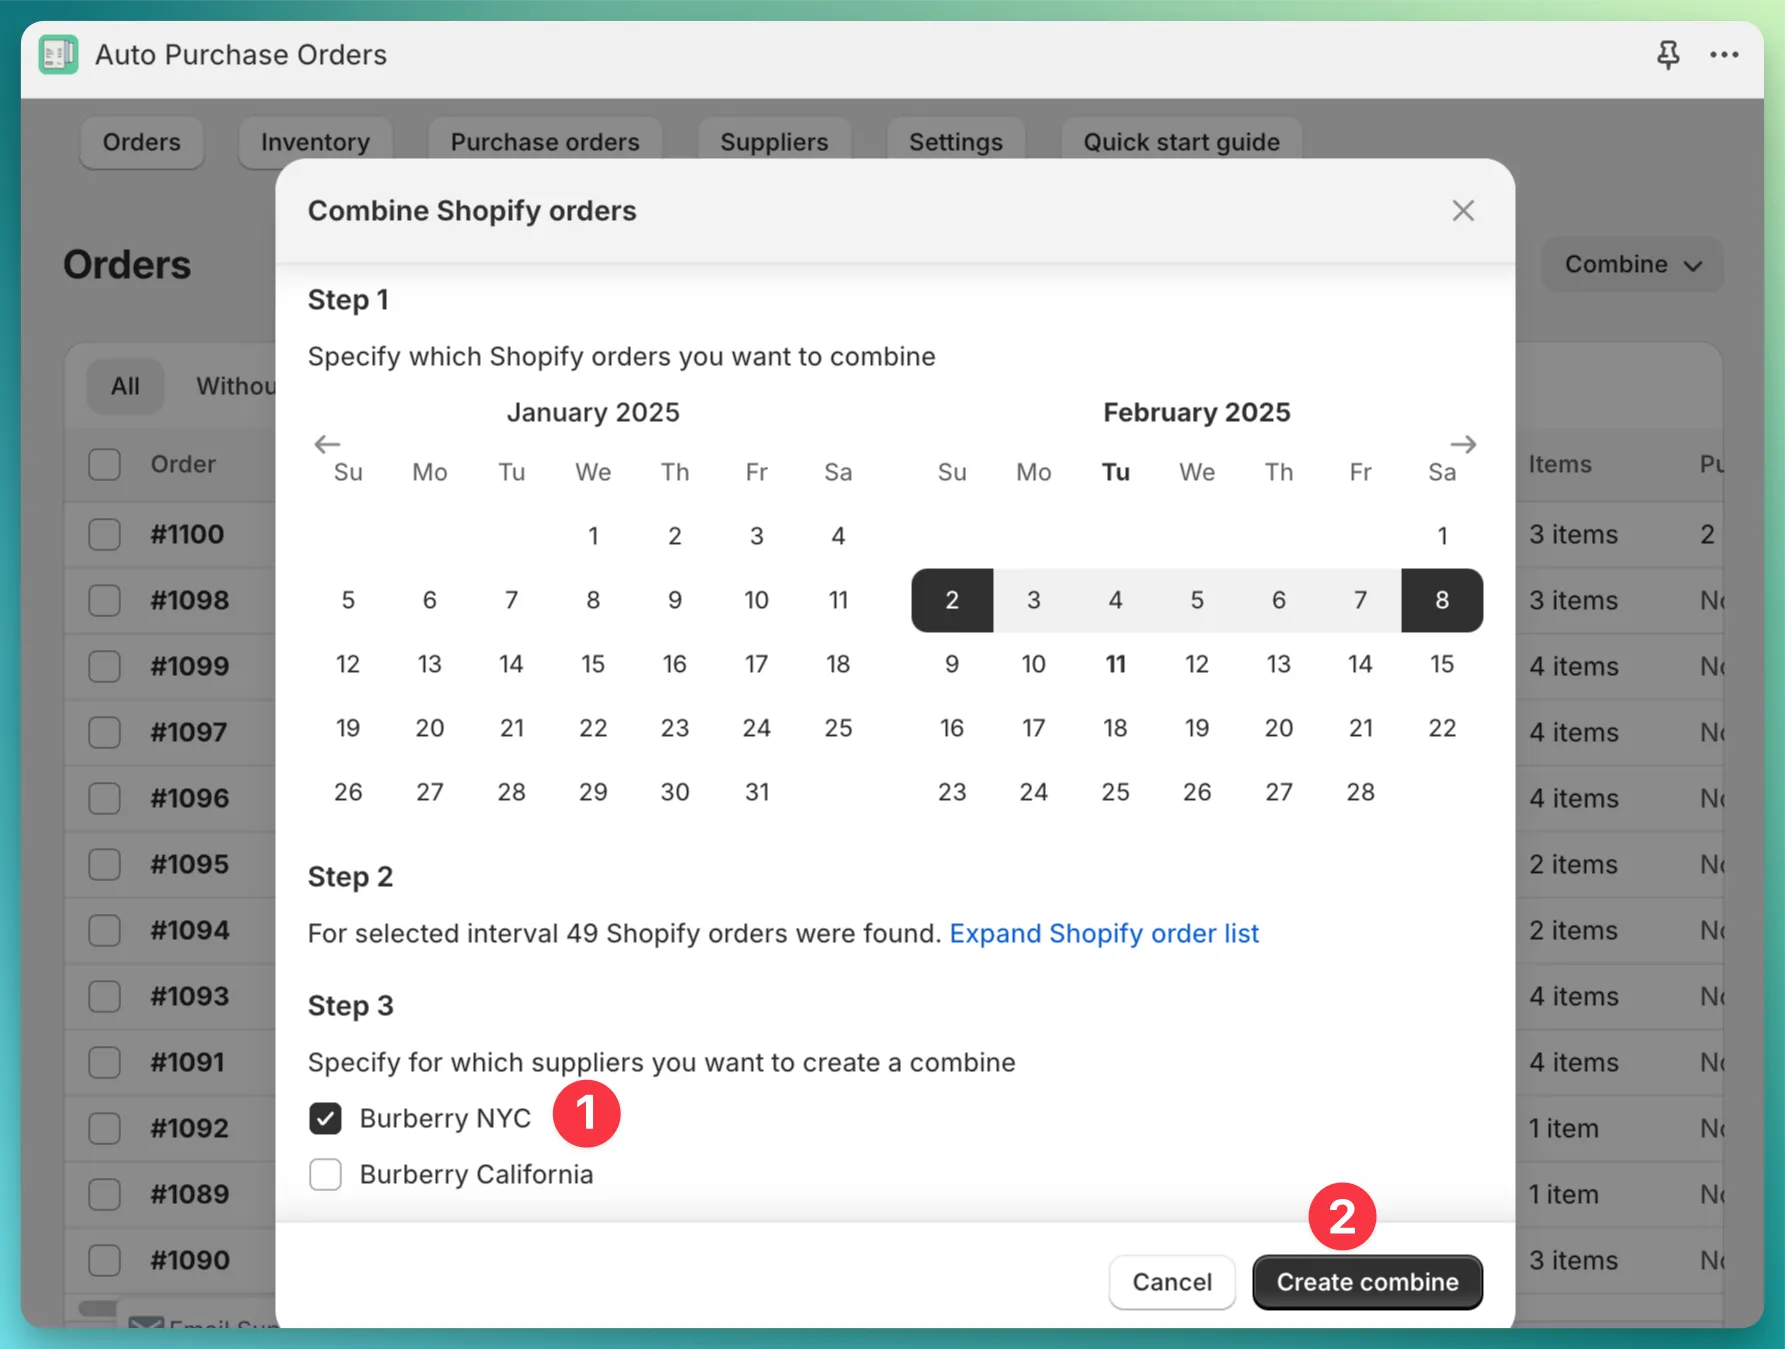
This method is a bit faster since you do not need to manually select Shopify orders, and it allows you to create a combination for more than 50 Shopify orders at a time.
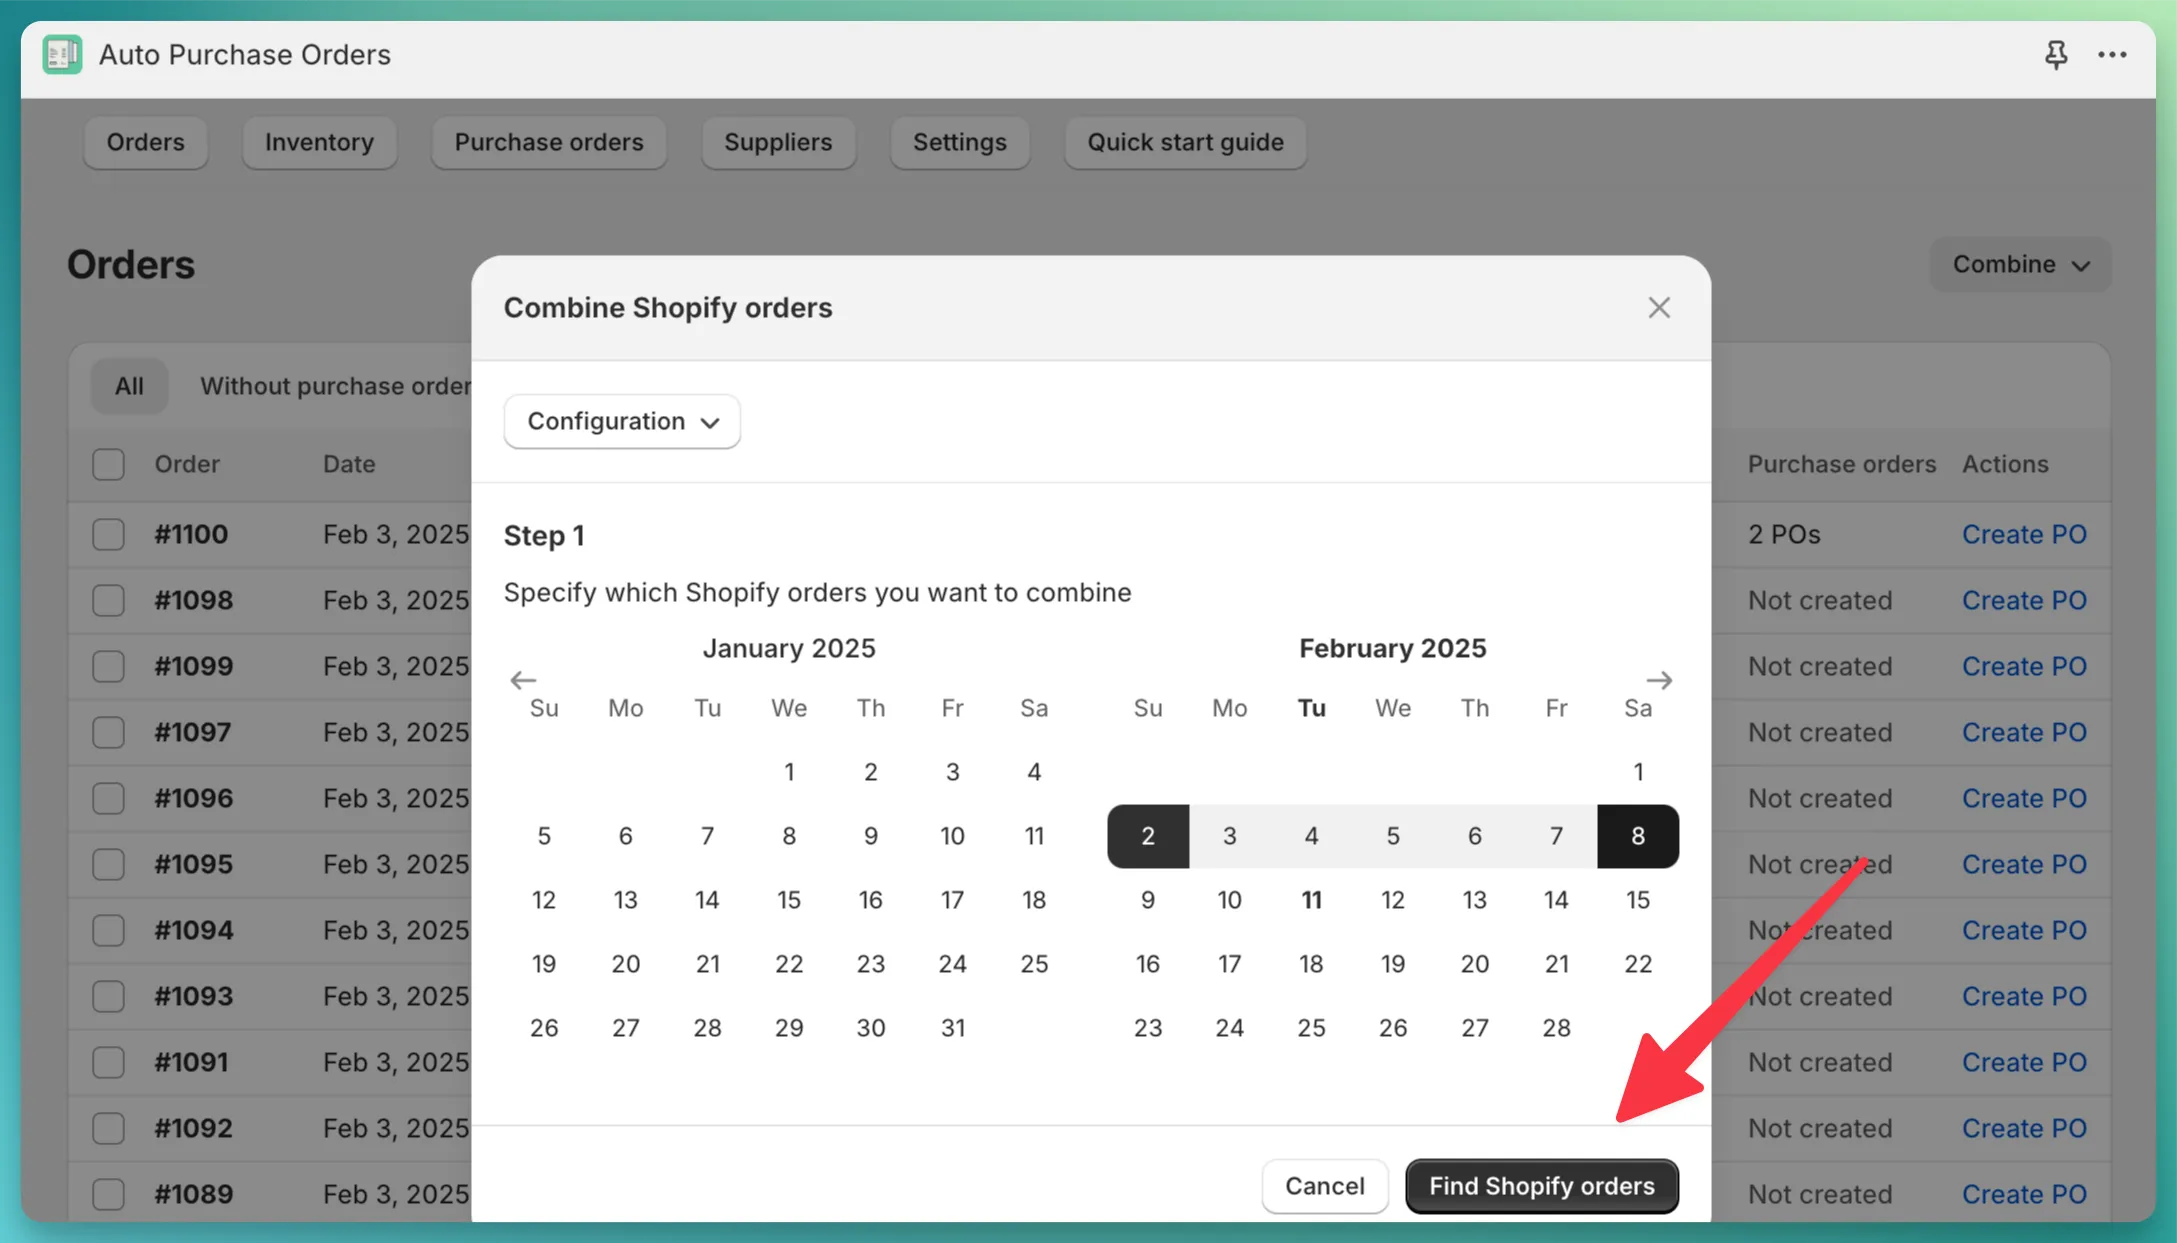
In order to create a combine by date range:
Combine which is located at the top-right corner.

Don’t see the button? Upgrade to the Professional plan.
Find Shopify orders. The app will preload all Shopify orders that were placed in this range,
but it will filter out the following orders - cancelled, archived.