Auto Purchase Orders logo Auto Purchase Orders
Help Center / Guides

Quick start


This comprehensive guide will help you get started with the app. We recommend taking the following steps as a priority, as they will unlock additional features and functionality, allowing you and your team to get the most out of the Auto Purchase Orders app.

  1. Add your first supplier - to get started, add suppliers to the app either by creating them manually or importing them using a CSV.
  2. Create a purchase order - the PO form is the app’s core tool. Explore it, create your first PO, and send it to your supplier.
  3. Configure your email domain - by default, POs are sent from purchaseorder@magicbits.io. 
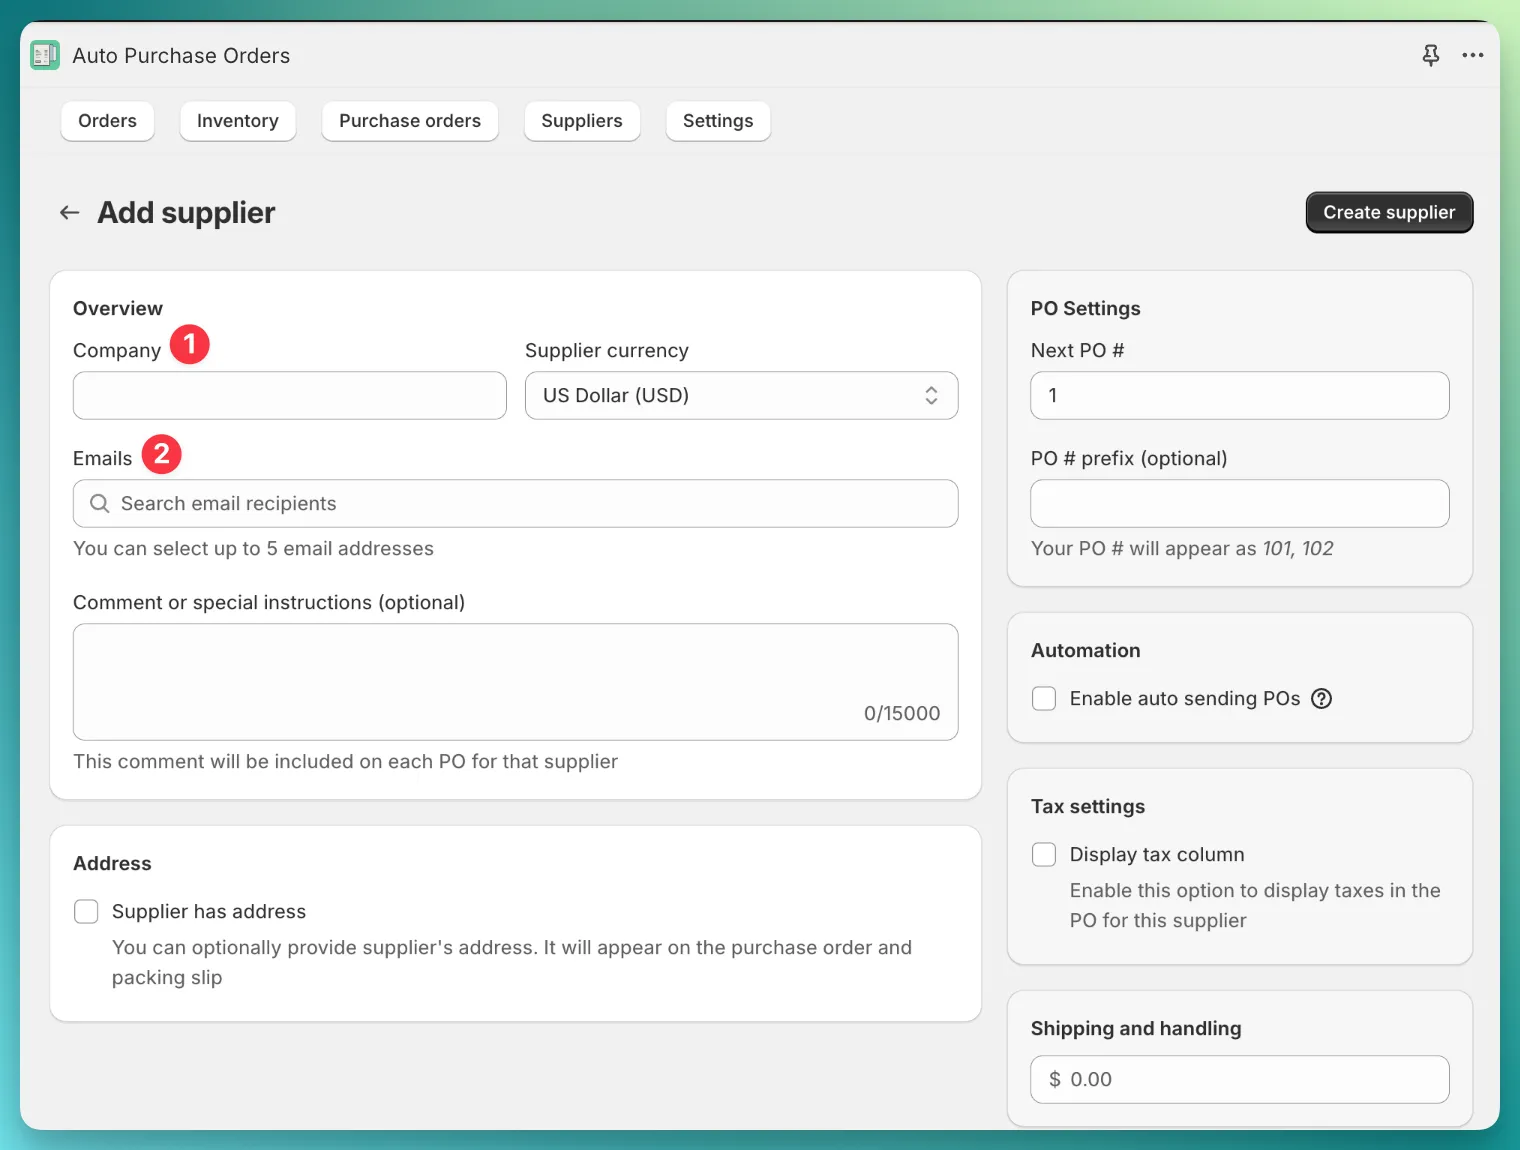
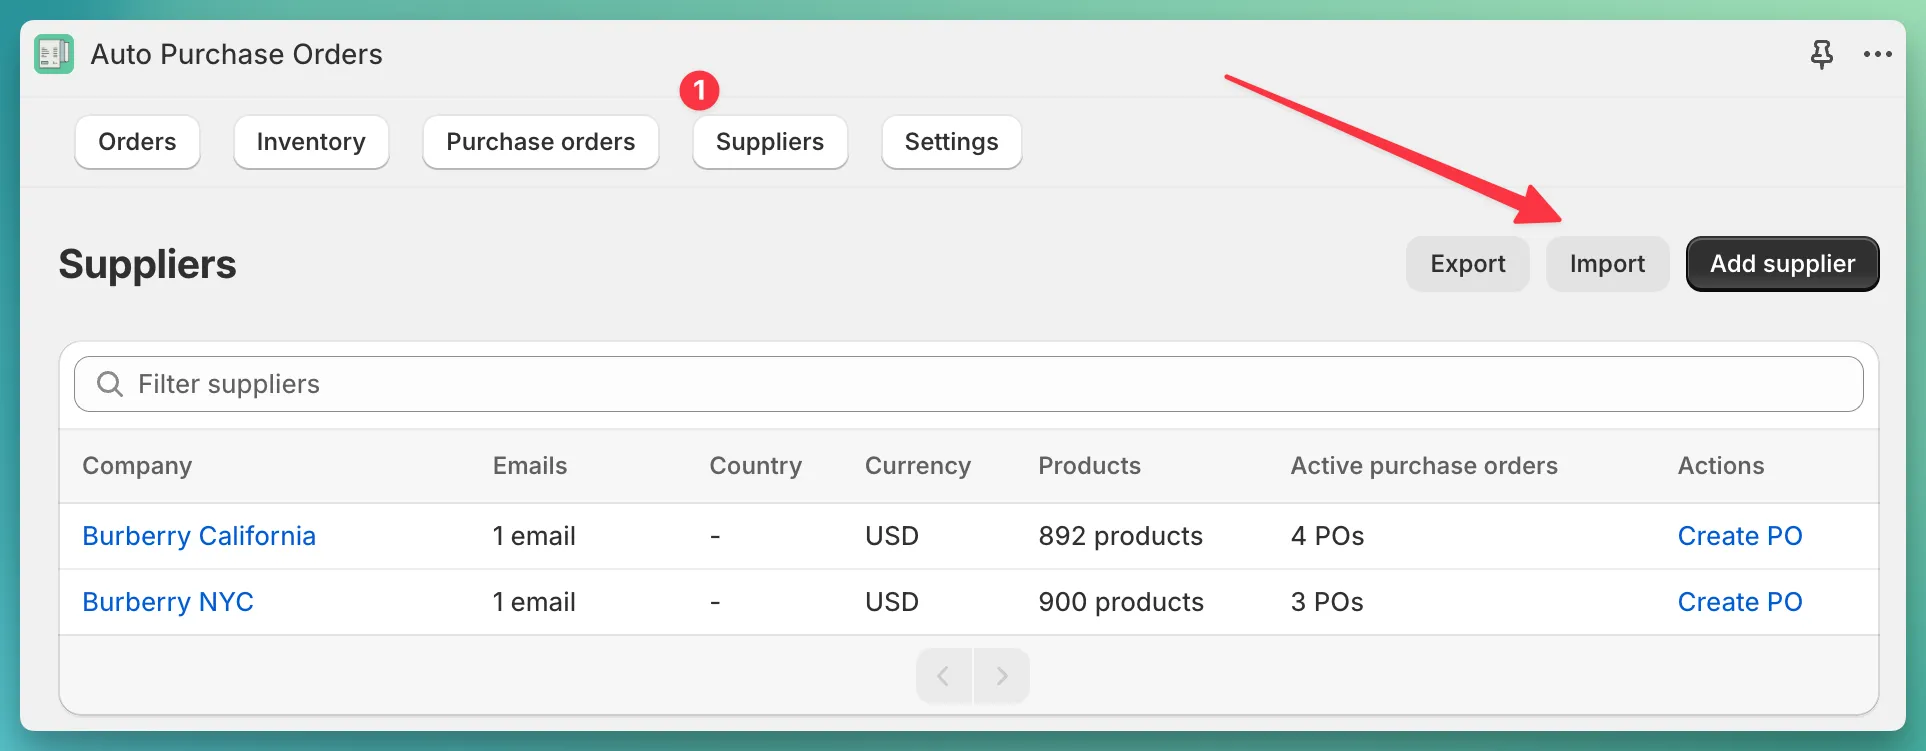
Set up a custom domain to send them from your business email for better deliverability and branding.
  4. Update supplier notification template - customize the email template to include addresses, PO products, or other details, tailoring the information for your supplier.
  5. Link Shopify products to suppliers - this enables your PO form to preload supplier-specific products and supports creating POs for Shopify orders or combined POs.

Step 1: Add your first supplier

You have 2 options to create a supplier in the app: manual or automatic, using CSV import.

  1. Manually create a supplier – open the app, go to the Suppliers page, and click the Add Supplier button. On the page that opens, you’ll see the supplier form. To create a supplier, you only need to fill in 2 fields: company name and email recipients.
    Supplier new page
  2. Automatic import using CSV template – open the app, go to the Suppliers page, and in the top-right corner, click the Import button.
    Suppliers import
    We’ll handle the import as soon as possible. When the modal opens, download the CSV template, fill it with your supplier details, and send it to our support team. We’ll import it as quickly as possible.

Step 2: Create a purchase order

Once you’ve created your first supplier, you’re ready to create your first PO. Open the app, go to the Purchase orders page, and click the Add purchase order button.

New PO form

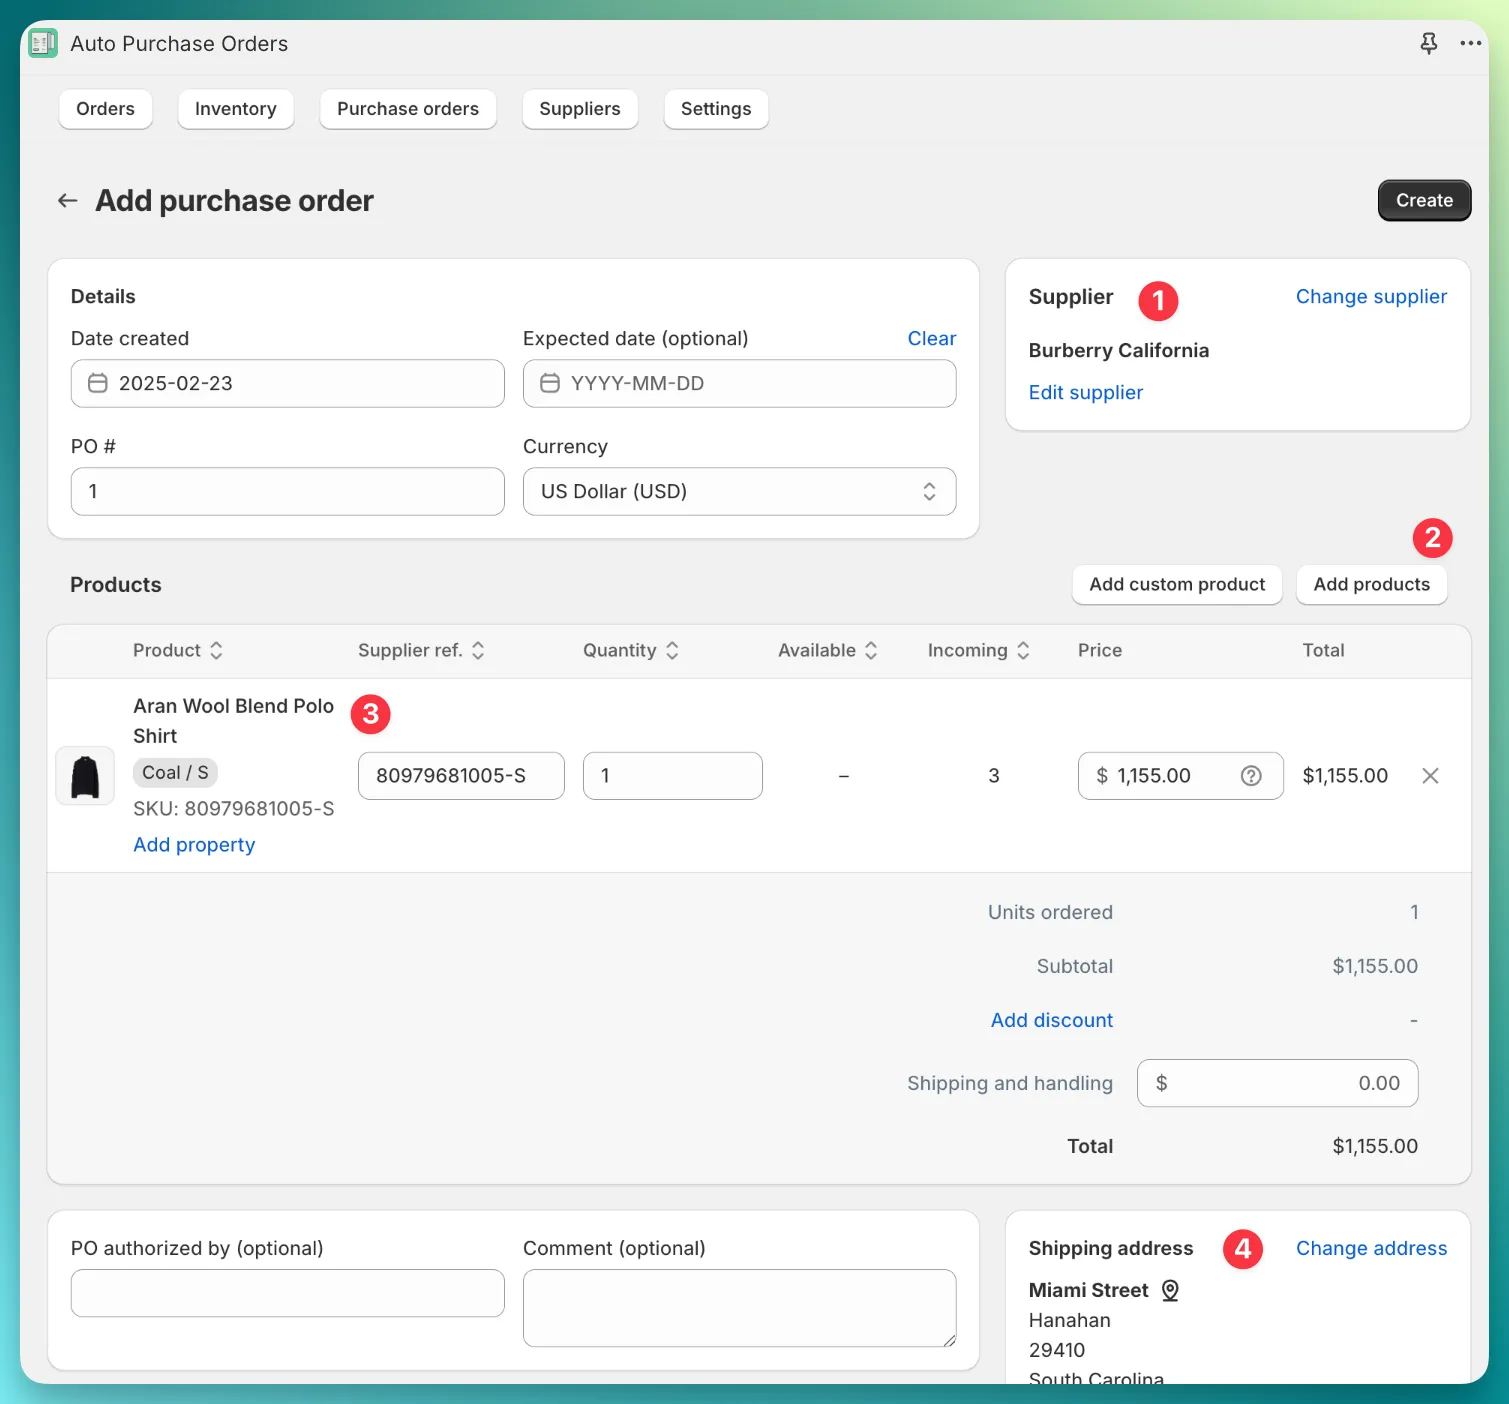
Here’s a quick overview of how the PO form is designed in the app:

  1. Supplier - you must select a supplier for each PO. We recommend doing this first when opening the form.
  2. Products - once a supplier is selected, you can add as many products as needed.
  3. Product details - for each product, specify the Supplier ref., Quantity, and Price.
  4. Addresses - select the shipping and billing addresses.

Once you create a PO, you’ll be redirected to the PO delivery page.

PO delivery page

As you can see in the screenshot, the app has preloaded everything for you, so you don’t have to manually enter any data.

  1. Email subject and body - these are preloaded based on your supplier notification template. We’ll explain how to configure the template later.
  2. Email recipients - the app has pulled in the email you entered when creating the supplier. Since this is your first PO, feel free to manually add your email here if needed.
  3. Documents - the app has generated the PO PDF and, if configured, a packing slip. Download them to verify everything looks correct.

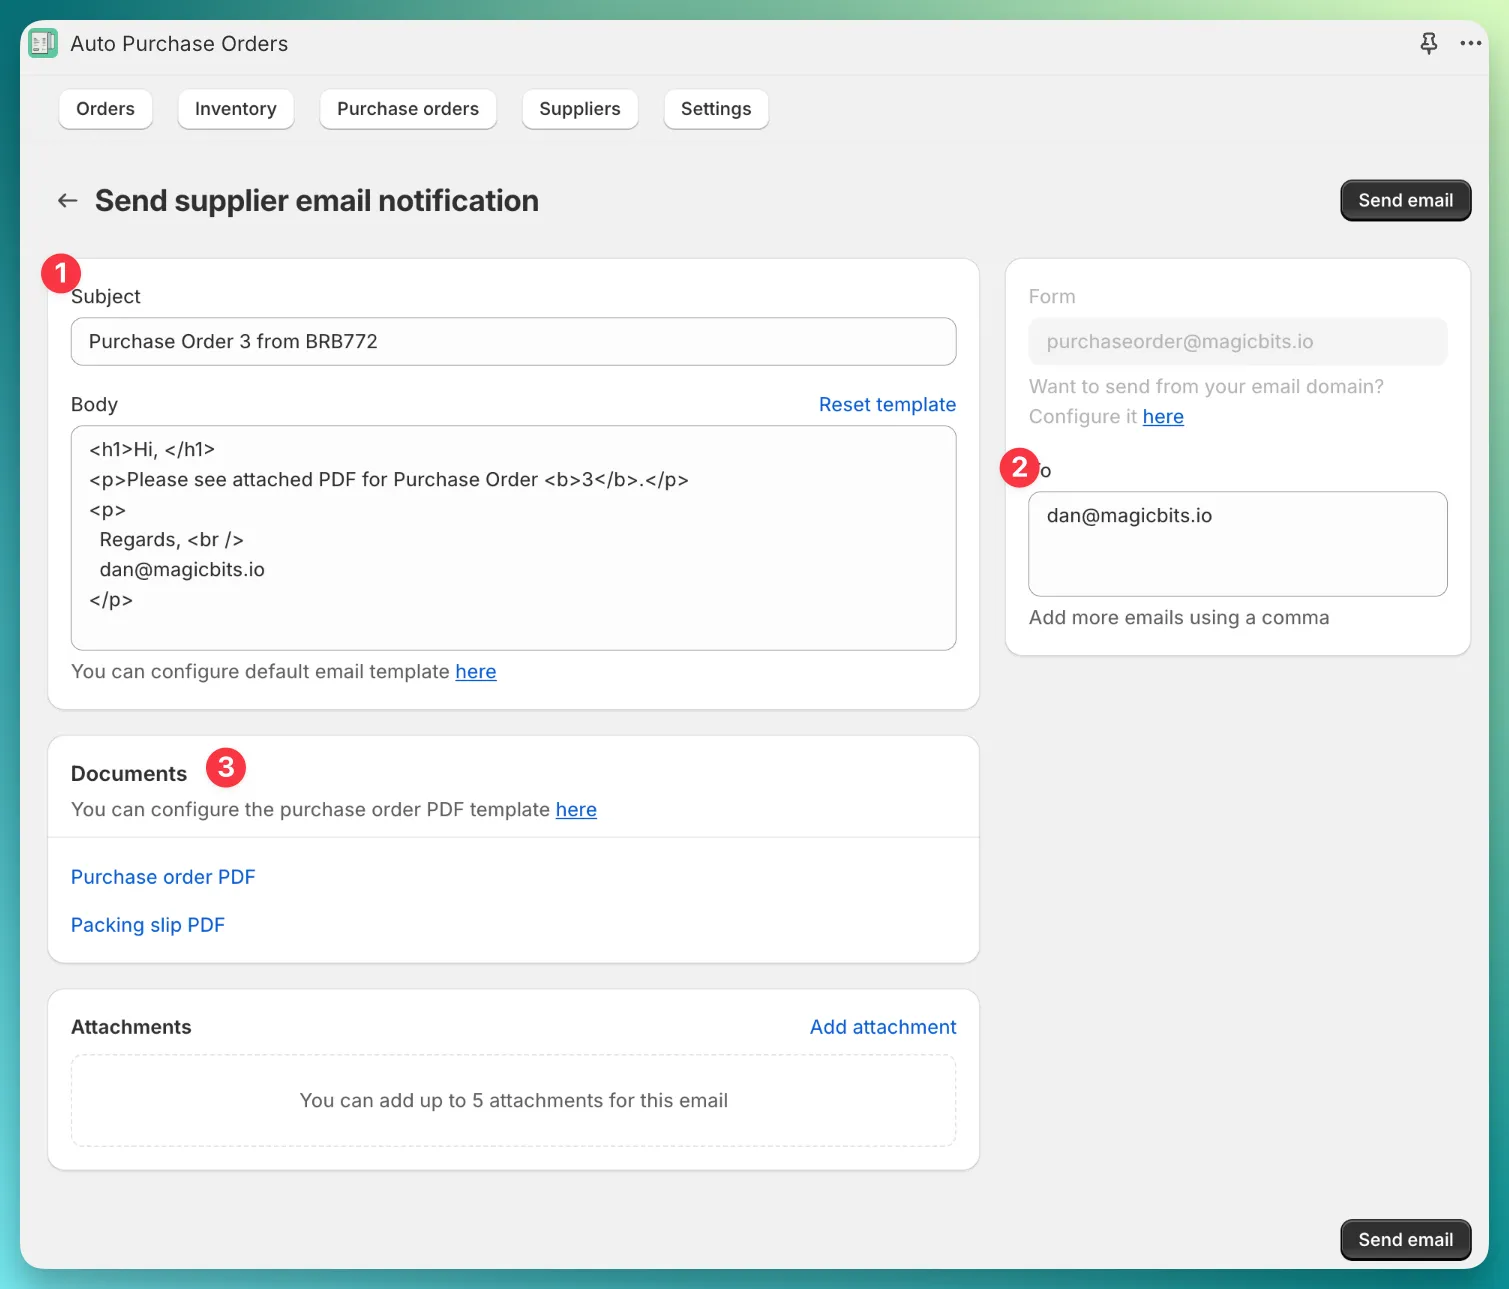
We’ve designed the delivery page as a form of PO verification. Simply check that the PO PDF is accurate and click Send email — no data entry required.

Step 3: Configure your email domain

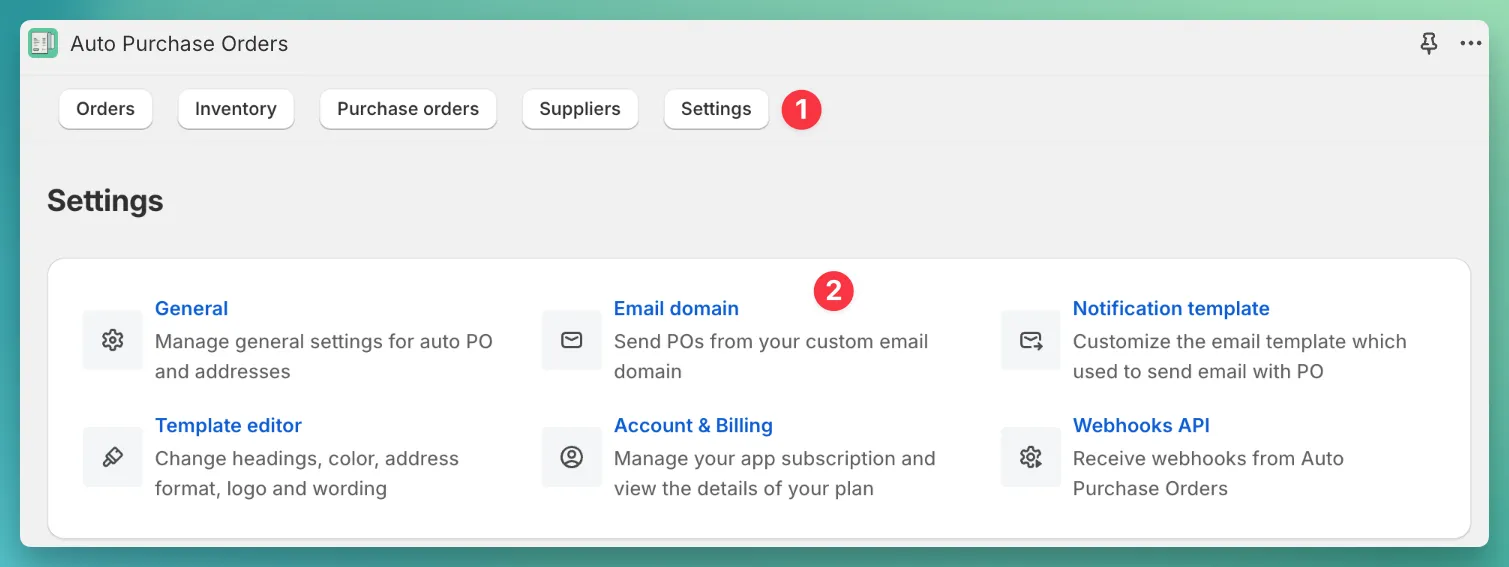
By default, the app sends PO emails from the email address purchaseorder@magicbits.io, but you can configure your custom email domain. To do this, open the app, go to Settings > Email Domain, and add your email domain.

PO email domain settings

Step 4: Update supplier notification template

As noted in Step 2, the app automatically generates the supplier email on the delivery page. Customize how it’s created in Settings > Supplier Notification Template.

Supplier notification template

In the app, you can link Shopify products to your suppliers, which provides the following benefits:

  • Enhanced PO form preloading control - this feature gives you detailed control over how the app preloads attributes like Supplier SKU, Unit Cost, and Tax Percent in PO form.
  • Automatic PO creation - linking Shopify products to suppliers allows the app to automatically generate Purchase Orders for Shopify orders, streamlining your workflow.

Learn more about how to link products to suppliers in this guide.


Auto Purchase Orders logo
Auto Purchase Orders
Designed, built, and backed by Magic Bits
Dan
Written by Dan
Published on